
DIY Boxware and Ryker Mount Storage Shelf Project
DIY Display Frame Holder For Your Collectibles
I needed a place to store my Boxware displays for patches and such. I decided to clean up some wood in the shed/shop and make one. I started with some 2′ gardening stakes and measured 1″ shelf space between where the shelves would go and drew some lines. I used some C-clamps to hold them together and ran them through the table saw about 1/2″ deep. I did buy a piece of dark hardboard, the kind with one side smooth and the other side rough – I’m not sure what they call it – Home Depot. I cut strips about 1″ wide and the depth of the shelves. I glued them with wood glue, a big drop in each slot, then slide the shelves in. I let them dry overnight. I found some more thin plywood, just waiting to be used on another Scouting project, and cut them to fit the top and bottom, then the back, then the sides. I nailed them together with my nail gun that I wish I would have had when I was 20, not in my 60’s! Makes it so much easier than trying to nail with a hammer and small nails. As far as changes, I would have used 2×2’s so there would be more area holding the Boxware in each row. Other than that, this will be a nice place to store my 15 or so boxes. I’m really happy to have this storage space now.
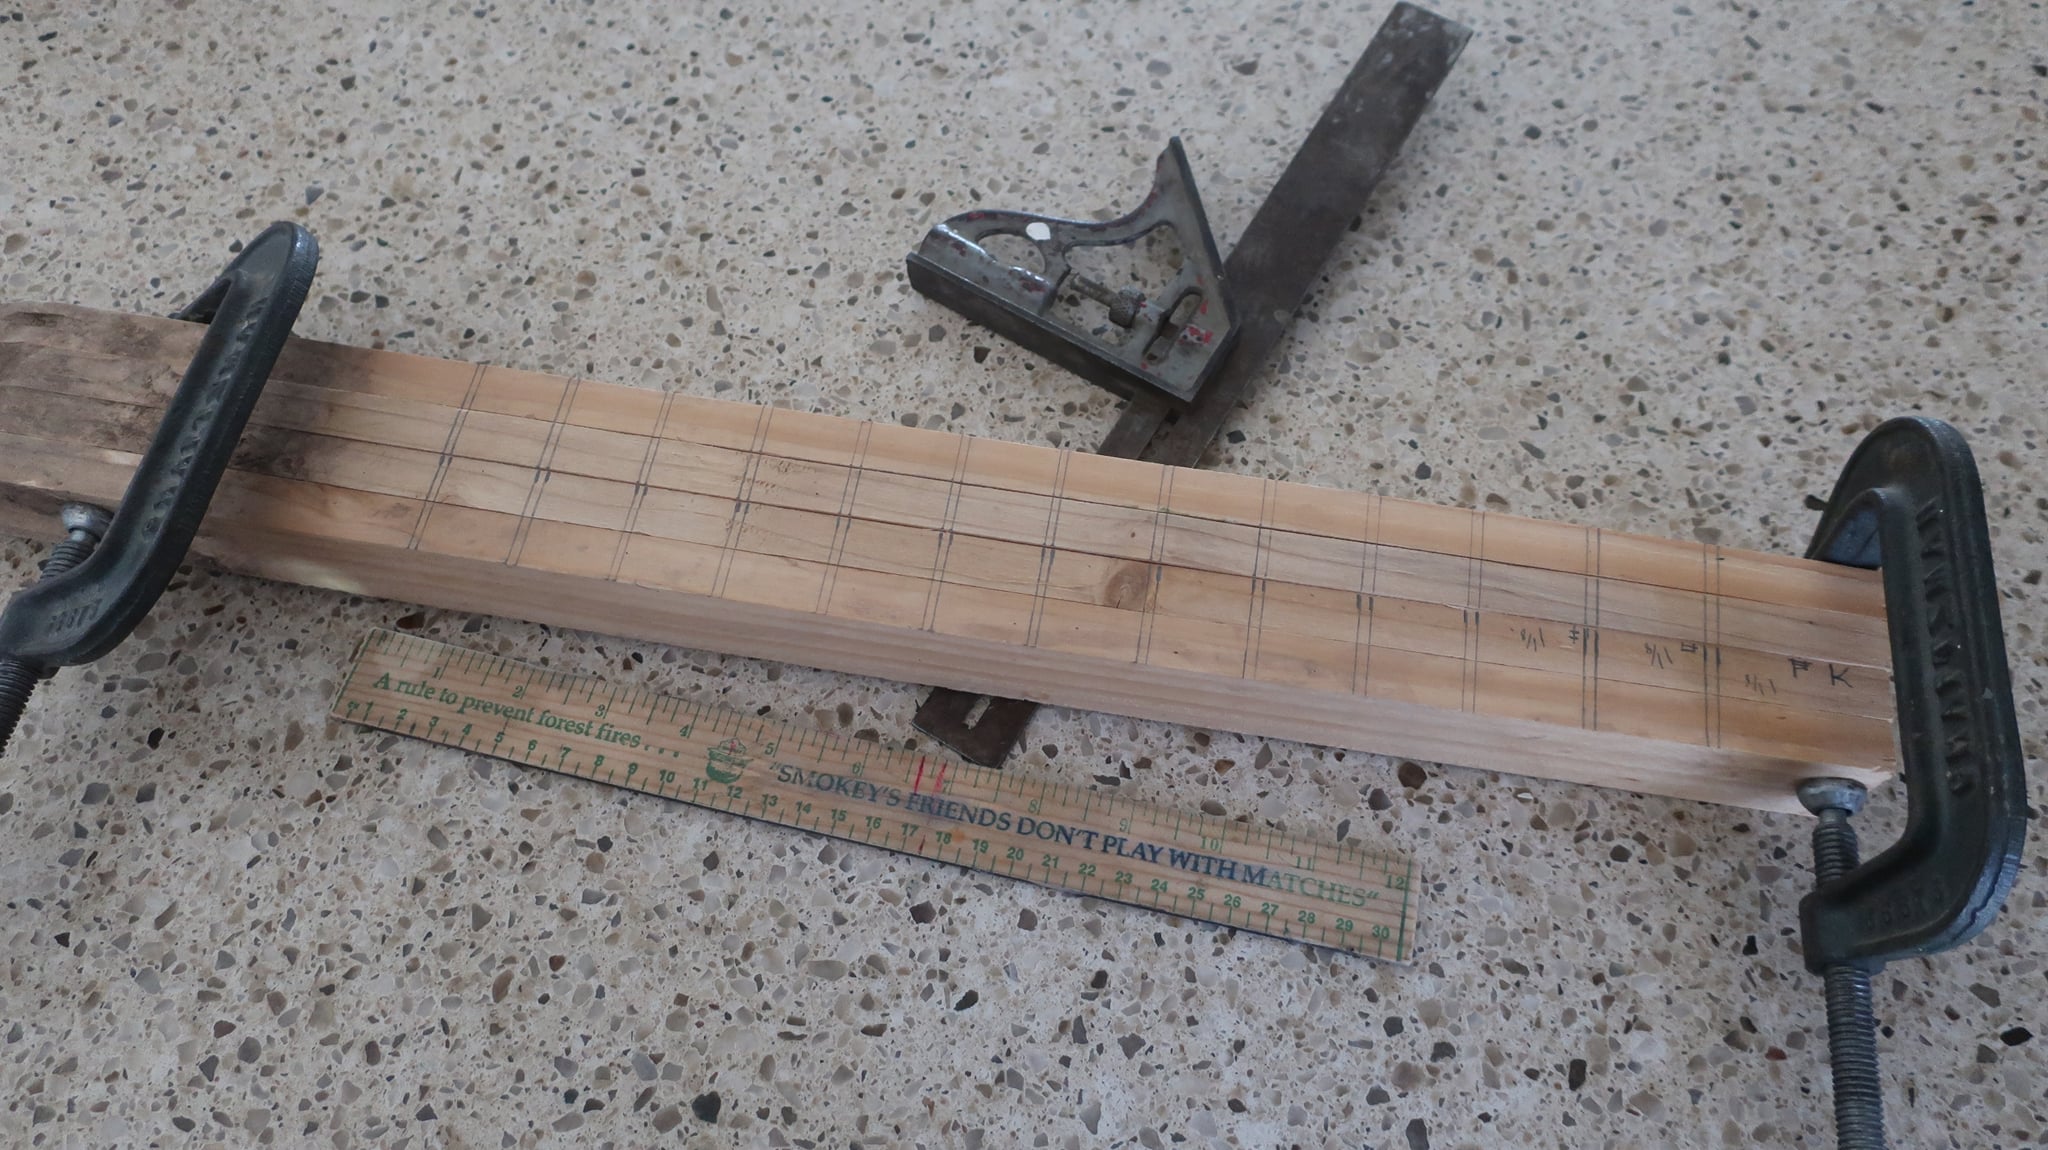
I started with some 2′ stakes. They’re a little dirty as they were in the ground this summer holding up my peppers.

Gluing the 1″ shelves in place.

All glued. Let them dry overnight.

Attach a top and bottom.

And now the back.
Now, it needs some sides.
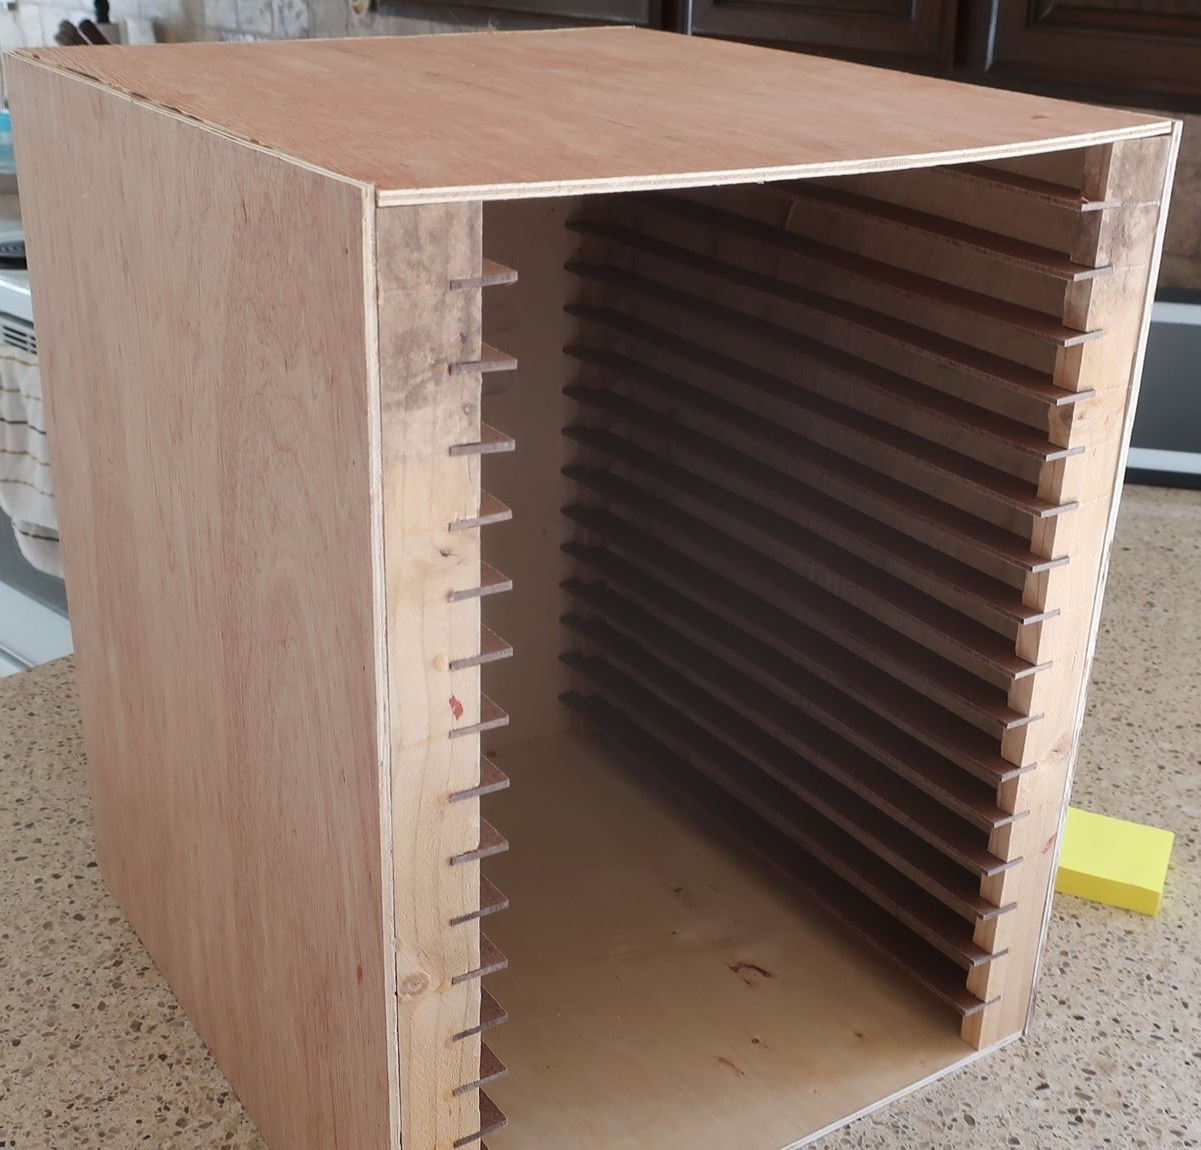
Oh, this is looking good, except for the dirt on the stakes!

Wow, now I have a place to store them, instead of tubs in the basement! The finished product!!!
This post was created by John Sorenson on the Scout Patch Collectors Facebook Page. I am sharing it with permission so that others can take John’s ideas and run with them.
Not to be outdone a few weeks later Doug Walker shared on the Facebook Group that he took this idea and “went big”!
Two 2×8’s, six half sheets of masonite, 186 router passes, 372 clamps, unclamps and table saw cuts and 744 drops of glue later, I have added storage for 186 frames.

the shelf columns have a crosspiece each at the bottom, the top sheet of plywood is screwed into the top of each post and the plywood behind the whole thing is screwed into the back of the rear posts. And then the backing plywood is screwed into the studs behind the unit. Each post is effectively a 2×2, so it would be some severe warping if anything moved enough to create a blowout.
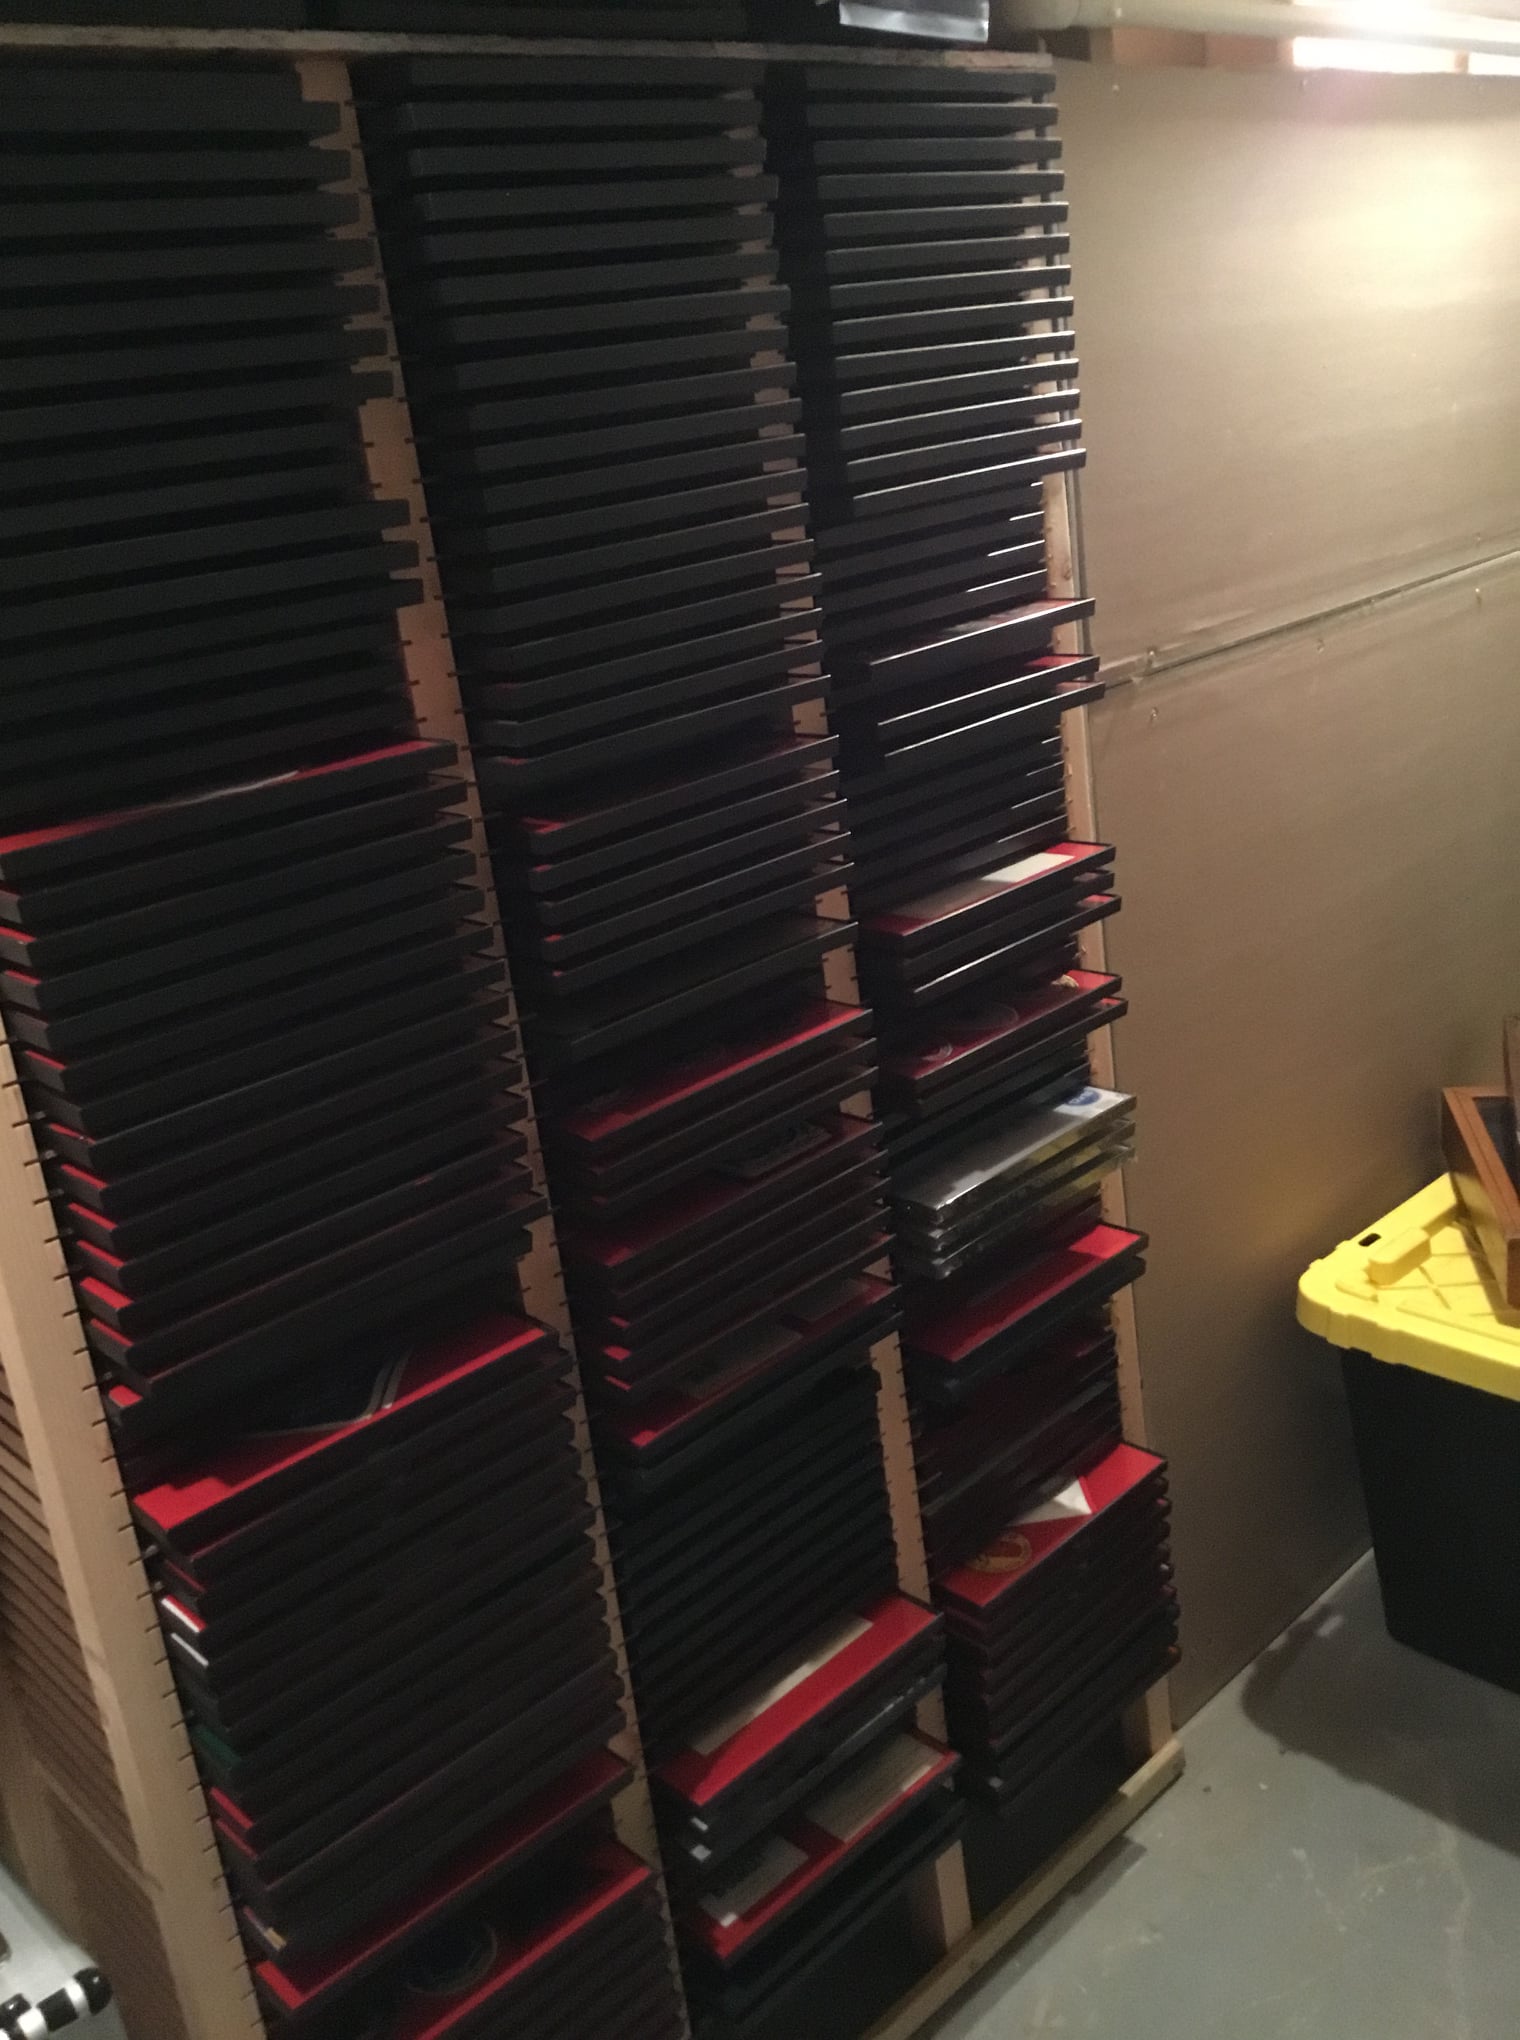
Straight lines every inch, starting 8” off of the floor. 1/8” router bit to cut the grooves about 1/2“ deep. Single sided cut in one of the 2”x8” boards, doubled sides cut for the other. Run the 2”x8” boards through the table saw at 1.75”. Masonite strips are 1” wide and 16” long. Then a lot of gluing. If you are using streamwood boxware, the spaces have to be greater than 1”.
Comments
The space between the interior edge of the rails and the wooden upright is less than the width of the frames used, so they cannot fall through.


Search this website
-
Categories

Charlotte Trade-O-Ree


I Buy/Sell Memorabilia
About The Santeeswapper
 Camp Director, Eagle Scout, Order of the Arrow Vigil Honor Member and past Chief, lifelong Scouter and patch collector.
Jason Spangler
14039 Hwy 74 East
Suite A6, #116
Indian Trail, NC 28079
(910) 671-4919 [text or call – leave a message]
email to santeeswapper@yahoo.com
Main website santeeswapper.com
I started collecting Boy Scout memorabilia when I was inducted into Santee Lodge 116, Order of the Arrow at Camp Coker in the summer of 1986. All the guys of ISWA chapter in Elk campsite seemed to be trading and since my dad sent me to camp with a small bag of patches, I jumped in and never looked back....
DISCLAMER:
ScoutPatchCollectors.com It is not officially affiliated with the Boy Scouts of America, the Girl Scouts of the USA or the World Organization of Scout Movements.
Since the thin shelves are on the inside of uprights and open to the sides, how do you prevent the displays from sliding left/right and falling down?
Is the depth less than the height of the display frame so the frames can’t slide “inside” the stakes or 2×2″ uprights?